
“You already have a CNC-Router, why do you need another machine?”
That’s probably the number one question i got about the new CNC.
I own the old CNC-router for about 4-5 years. It was one of the first tools i bought when starting my woodworking journey. For a long time i only had a power drill, a cheap hand saw and a CNC-router.
With each year i have came closer to the limits of the machine in terms of speed, power and especially rigidity. Going deep in hardwood? Trying to get a good surface finish on non ferrous metals? Not gonna happen with my old machine.
Additonally with my weekly projects this year i pretty much had to fix something every week to keep the machine going.
I was more and more handicapped in the things i could do with the old CNC, that the urge to upgrade to a new one got bigger and bigger.
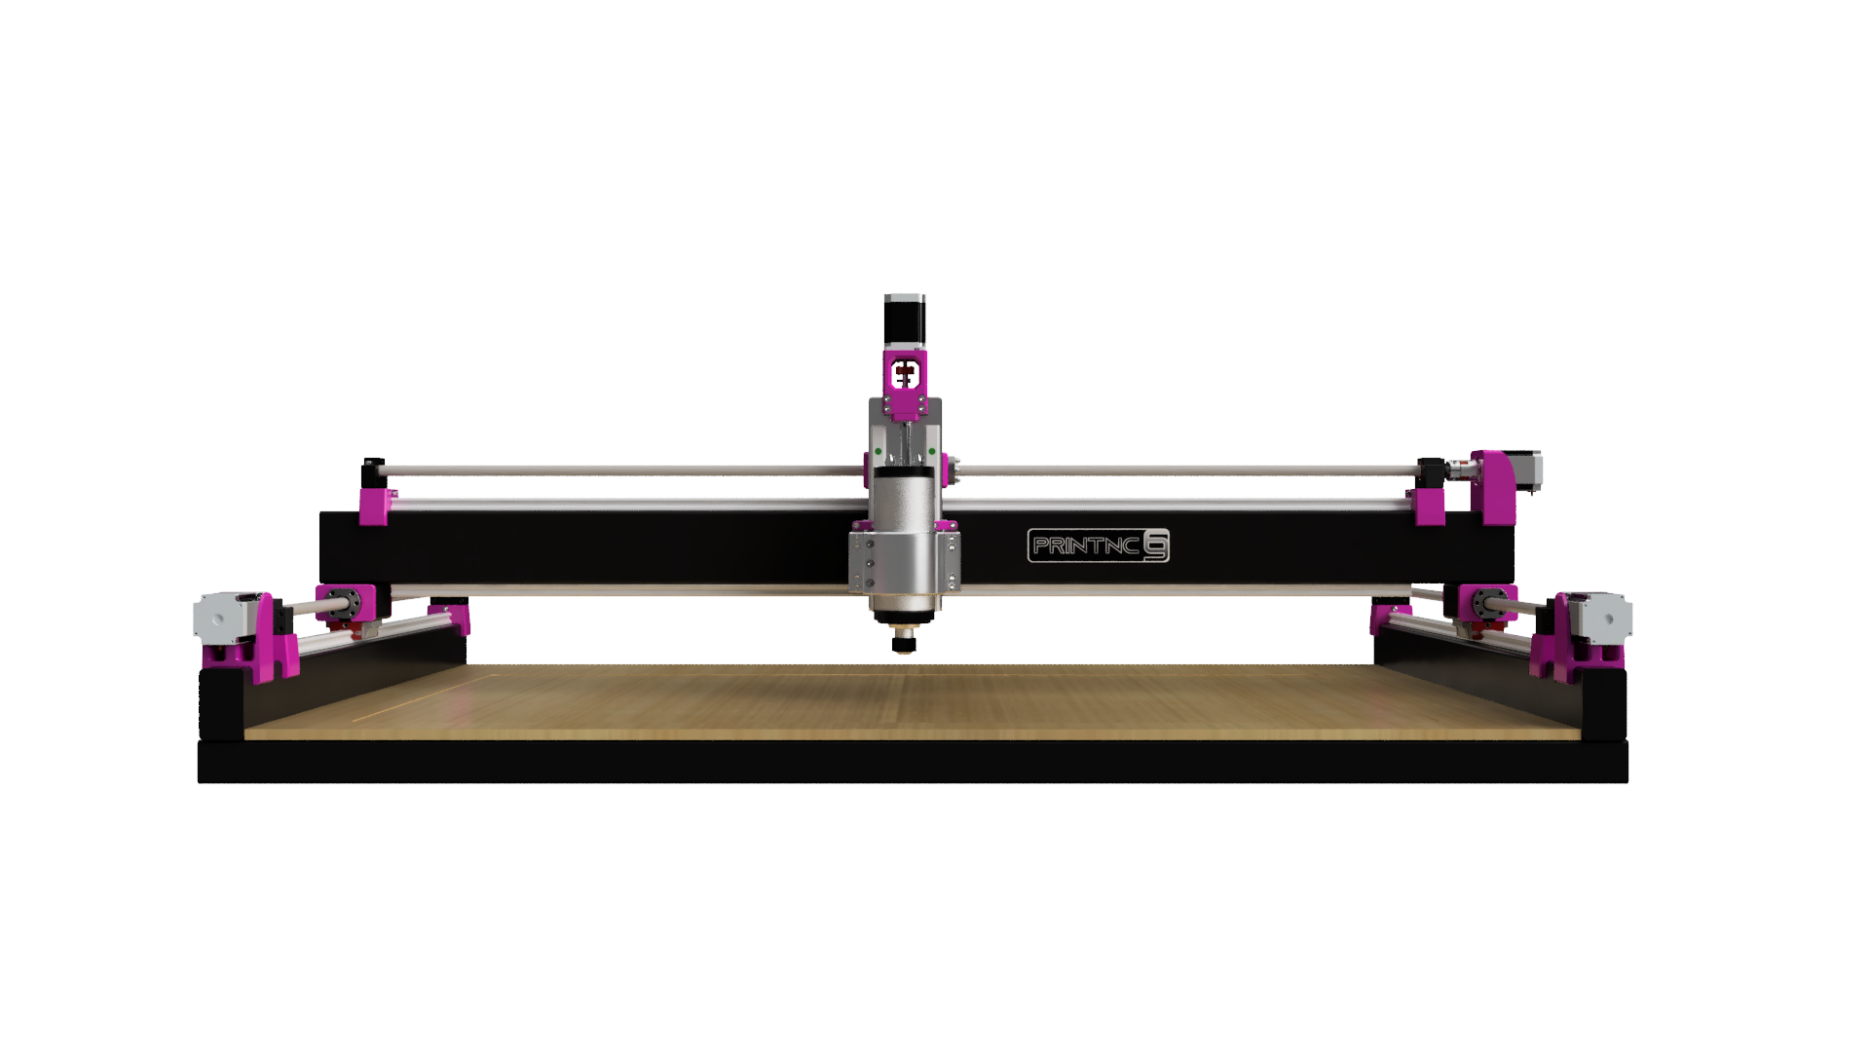
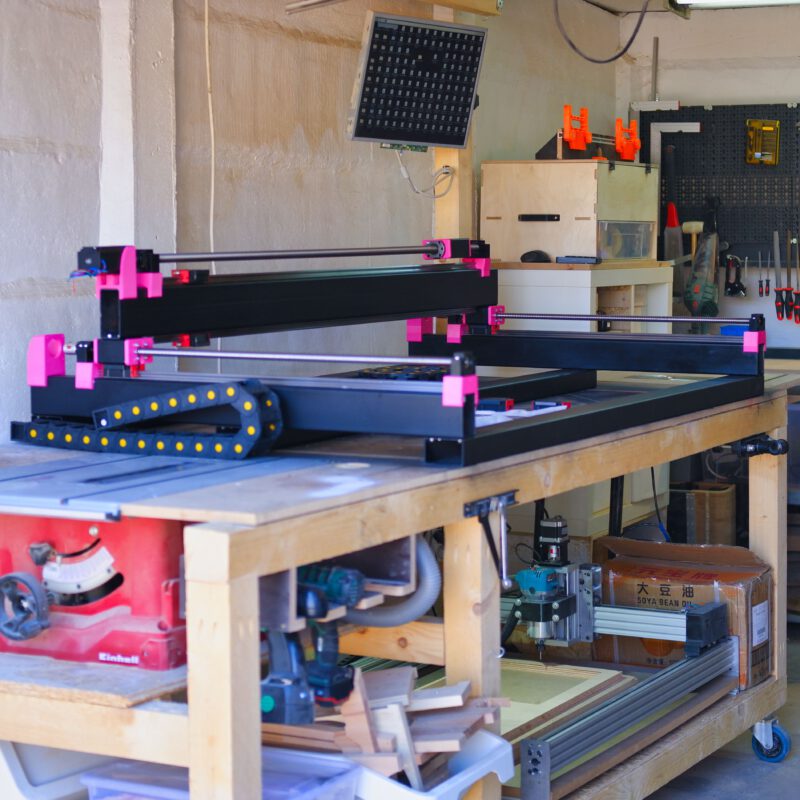
Then one day i stumbled on this website called https://threedesign.store/. I was fascinated the moment i saw it. It avoided all the shortcomings from entry level desktop CNC-routers that are on the market. To name a few:
- ballscrews on all axes
- powerful and heavy duty spindle (2,2kW water cooled spindle options)
- rigid steel frame
- 3D-printed parts on the parts you can get away with less tensile strength
- able to mill non ferrous metals with ease and steel to some extent
To put it briefly, it was the best entry level machine in the price to performance category i ever came across.
The only downside is you have to dig yourself really deep into the project and have to build pretty much everything yourself.
Planning
If you want to know if this is the right machine for you, check out all the available resources. To name a few:
- Wiki of the printNC
- Discord (insanely useful people there to help with your noob questions)
- Fusion360 model
It is highly recommended to read through the Discord for a couple of weeks to really get into the project and find out if this machine is for you. I was hooked, so i kept planning my build.
The machine concept is fully parametric. You can customize the build to your needed dimensions.
I mainly do sheets of wood so i wanted to be able to pass a full sheet through the machine. Therefore i increased my X-axis to a work area of over 1250mm.
Due to the size of my workshop the biggest dimensions i could get away with, was a footprint of 1600mm x 1000mm.
There is a calculator on the printNC website to calculate all your machine dimensions based on your work area. It even shows you which profiles, screws and other hardware you should get.

Purchasing
After i was sure about all the dimensions and parts to get, i started ordering my parts.
You can separate your hardware into two categories:
- Locally sourced
- steel tubing and aluminium plates and angle
- bolts
- wiring
- printer filament
- wasteboard
- power supply (because i went with a Cisco PSU)
- bought directly in china
- Ballscrews and ballscrew-mounts and ballscrew-bearings
- linear guides
- Spindle + VFD + waterpump
- stepper motors and stepper drivers
- inductive limit switches
You can checkout a BOM of all the necessary parts here: official BOM Link
Here is the summary of my total build costs (work in progress, will get updated as the build progresses):
| item | cost |
|---|---|
| Aliexpress-kit linear hardware: (2x hgr20-1400mm; 2x hgr20-800mm; 2x hgr20-250mm; 6x hgw20cc; sfu2010-1500mm; 2x sfu1610-900mm; 1x sfu1204-300mm; 1x bkbf15; 2x bkbf12; 1x bk10; 2x xb25*30-8*10; 1x xb25*30-8*12; 1x xb25-30-8*8) stepper motors and drivers: 4x 57hs100 2,5Nm stepper motor 4x DM542 stepper driver spindle and accesories: 2,2kW water cooled spindle VFD 230V 80mm spindle clamp ER20 collet set water pump and 5m water pipe acessories: 3m of 25mm x 57mm cable chain 5x LJ8A3-2-Z/AX m8 inductive limit switch | 920€ including shipping and all tax and customs |
| Steel tubing (machine footprint 1600mm x 1000mm) 1x 100x50x3x1625mm 3x 80x50x3x1600mm 2x 80x50x3x1000mm 2x 80x50x3x70mm 1x 80x50x3x100mm | 210€ |
| Aluminium angle (z-axis) 80x60x4mm aluminium angle bracket | 6€ |
| 3D printer filament 2kg of PLA-filament Magenta | 45€ |
| Power Supply Cisco Systems WS-CAC-1300W (refurbished) | 32€ |
| Spray paint 6x 500ml matte black | 20€ |
| GRBL Controller Arduino UNO (had it laying around) Arduino UNO screw in terminals | 10€ |
| Control PC Raspberry Pi4 4GB | 57,5€ |
| Endstop breakout board Connects up to six inductive limit switches to your controller | 13€ |
| Lithium grease Liqui P000370 Moly LM 3406 LM 50 Litho HT, 400 g | 10€ |
| total expenses | 1313,5€ |
conclusion
To get an idea of the expected performance of the printNC you can watch this video of the creator of this machine:
If you have the tools and the skills to build this machine. It will give you the best price to performance ratio of all the available entry level machines.
social
If you want to stay tuned for future projects follow me on Instagram:
@things_ex_machina
1 Comment
Add Yours →Thank you for writing such an article to popularize relevant knowledge. It is very helpful to me. It is also well written and of high quality.